Welcome!


I have always enjoyed being crafty. I remember getting really excited about stickers and fun stationary when I was little. Well its good to know that some things in life never change!

I was introduced to scrapbooking in 2005 and have been hooked ever since. My love of crafting has branched out to include DIY, projects, gardening, baking, and canning. I hope to share my projects here.

Sunday, December 18, 2011

2011 Christmas Card

Hi all!

I just want to put up a quick post of my Christmas Card for this year.
It is a super simple card. The scalloped base and large circle layer were cut using Art Philosophy cart. This is my new Go-To cart. There are so many images on this cart, and EVERY button and shift key is filled, unlike many of PC's newer cartridges.

I really hope Close To My Heart comes up with another fully designed cartridge. I would buy it for sure!

I stamped some images using Stampin' Up craft Ink in Whisper White. The snowflake stamp is one I picked up a few years ago. I wish I had saved the packaging so I could tell you who made it, but alas, it is a mystery.

The Let it Snow stamp is a Fiskars' simple stick, repositional stamp that I picked up this year. I have to say, that although I love to be able to see through the acrylic stamps, I really like the crisp images you get from a rubber stamp. The Fiskars' stamps are tacky so they stick to the clear blocks very nicely.

I added some glitter to the card fronts using this AWESOME glue pen my friend hooked me up with. Its called Write 'n' Rub foiling pen. I traced where I wanted glitter, then you let the glue dry until its clear. Then it is tacky for ever so you can do all your gluing first and then go back and add the glitter. Its great for mass-production things like Christmas cards. I will say that the glue is a little smelly, but its a small matter for such an great working product. I will definitely be adding more of these to my adhesive arsenal.

Gotta run...Christmas is fast approaching and I still need to finish a few things as well as make my cookies! .....Where DID the time go this year?

Thanks for visiting today.

Hope everyone has a fantastic day!

Jan


Tuesday, December 13, 2011

Red, Black & Cream Holiday Mini Album

Hi All!

FINALLY something I can post about! I have been very busy crafting, but as most of the things I am currently making are gifts, I can not post most of them here until they have been given to the recipients.
I don't want to spoil the surprise.

Actually, I did make these as teacher gifts, but I don't think any of my dd's teachers visit here, so I am safe in posting this early.

I decided to make these cute mini albums based on a design for a mini I made at Archiver's a few years ago.


I purchased one 8.5 x 11 paper pack from Hobby Lobby, and the rest of the supplies were all from my stash. (I have alot of stash. LOL) The shape is from Art philosophy and the Joy is a fiskars stamp.


Page 2 uses Tim Holtz Snowman embossing folder on Coordinations Black Magic collection in Black/tan. The snowflake is from Art Philosophy. I glittered the snowflake. The tag is hand cut and I used a fiskars border punch on the bottom.

Here is the back side of page two. I used a strip of paper from the pack to cover the backside of the snow man. I used a glitter pen to give a few sparkle highlights to some of the ornaments on the paper.
Page 3 is made out of acetate. I adhered a smaller red square to the front and then cut a flower from Flower Shoppe.

Here is a close-up of the flower. I cut two layers from Flower shoppe out of black glitter paper. I then used a clear epoxy circle sticker and placed it on one of the coordinating patterned papers from the pack and cut it down to size to make the center. It is hard to see, but I inked the edges of the flower in Tim Holtz Barn Door (Red) to stand out some more. I love the way it looks, the picture just doesn't do it justice.

Here is the back side of the acetate page. I cut the snowflake doily from Art Philosophy. I stuck a few gems on some of the snowflakes.

For the next page, I used Sizzix Starry Night #2 embossing folder on red/Black Magic Coordinations paper. I used the Tim Holtz tiny attacher to add the trim at the bottom.

The ornaments were from Art Philosophy. I use glitter on the cuts and tied Bakers Twine for the strings.

Here is the backside of page 3. I used a border punch to make the border, and the mat is from another piece of coordinating paper from the stack.

I made a small tulle rosette and another epoxy button for the middle.

This next page is smaller than the rest. It is made out of grunge paper. It is embossed with Sizzix Sugar folder. I made a little garter for the page using some stretchy ribbon. The snowflake is a white brad that I covered with cream colored liquid pearls.

Here is the last page. I used plain cream colored cardstock and embossed it using Cuttlebug's countdown to Christmas folder. I filled in a few of the impressions with a glitter pen.

The Poinsettia is cut from Art Philosophy. I cut three layers, inked the edges in Black Soot, shaped the petals and added gold glitter to the center.

Here is the backside of the last page. I just added a strip of patterned paper that was left over after cutting all my squares. I also added a few black star gems from my stash.


Here are all eight minis I made. The covers are different, but all inside pages are the same. I used red. black and cream ribbon and tulle to decorate the spines.

One batch of gifts done, now I have to go and finish more....

Thanks for visiting today.

Have a Great and Crafty Holiday Season!

Jan

Tuesday, December 6, 2011

Xmas Tube Treats

Hi All!

Today's post is some little treats I made for my nieces and nephew. I borrowed this cartridge from a friend of mine to see if I really wanted to get it. I love birds and there are some really cute little birdies on this cartridge.


I chose the Santa image on page43 for my tag. I used my bazzil scraps for all the bird cuts. For the Beard I used liquid applique and sprinkled glitter over it before heating. (A tip I learned from my Friend Missie. Thanks Missie!) The fur trim on the hat has just plain liquid applique on it. The stamp is from 7 Gypsies. I added a few dots using a white gel pen. The rick-rack and pearl strings are also from my stash.
Here is a picture of the test tubes I filled with mini M&Ms. I tied them to the tag using a sheer ribbon from Hobby Lobby. The diamond paper is from Recollections Jingle Bells Stack.
Thanks for visiting today.

Have a Great and Crafty Day!

Jan

Monday, December 5, 2011

Mom's 70th Birthday Cards

Hello! I have been away from my blog for too long. I have recently been diagnosed with arthritis, although the doctors are still trying to determine whether it is a rheumatoid or osteo variety. I have been struggling with my arthritis and crafting. Some days are better than others, but I am getting better at living with the changes that are occurring.

I am going to really strive to craft a little everyday. My plan is to also pick up my blog posting again. Although, I have made a few items recently, Most are gifts and I do not want to spoil any surprises for the recipients, so I will not be posting them until after the gifts have been given.

Anyway... We recently celebrated my Mom's 70th Birthday. My siblings and our families met near St. Louis for Thanksgiving weekend. We all haven't been together since my Dad passed away so it was great to have everyone there.

We all went in together and bought my Mom a new laptop and I was charged with making the card for everyone to sign.

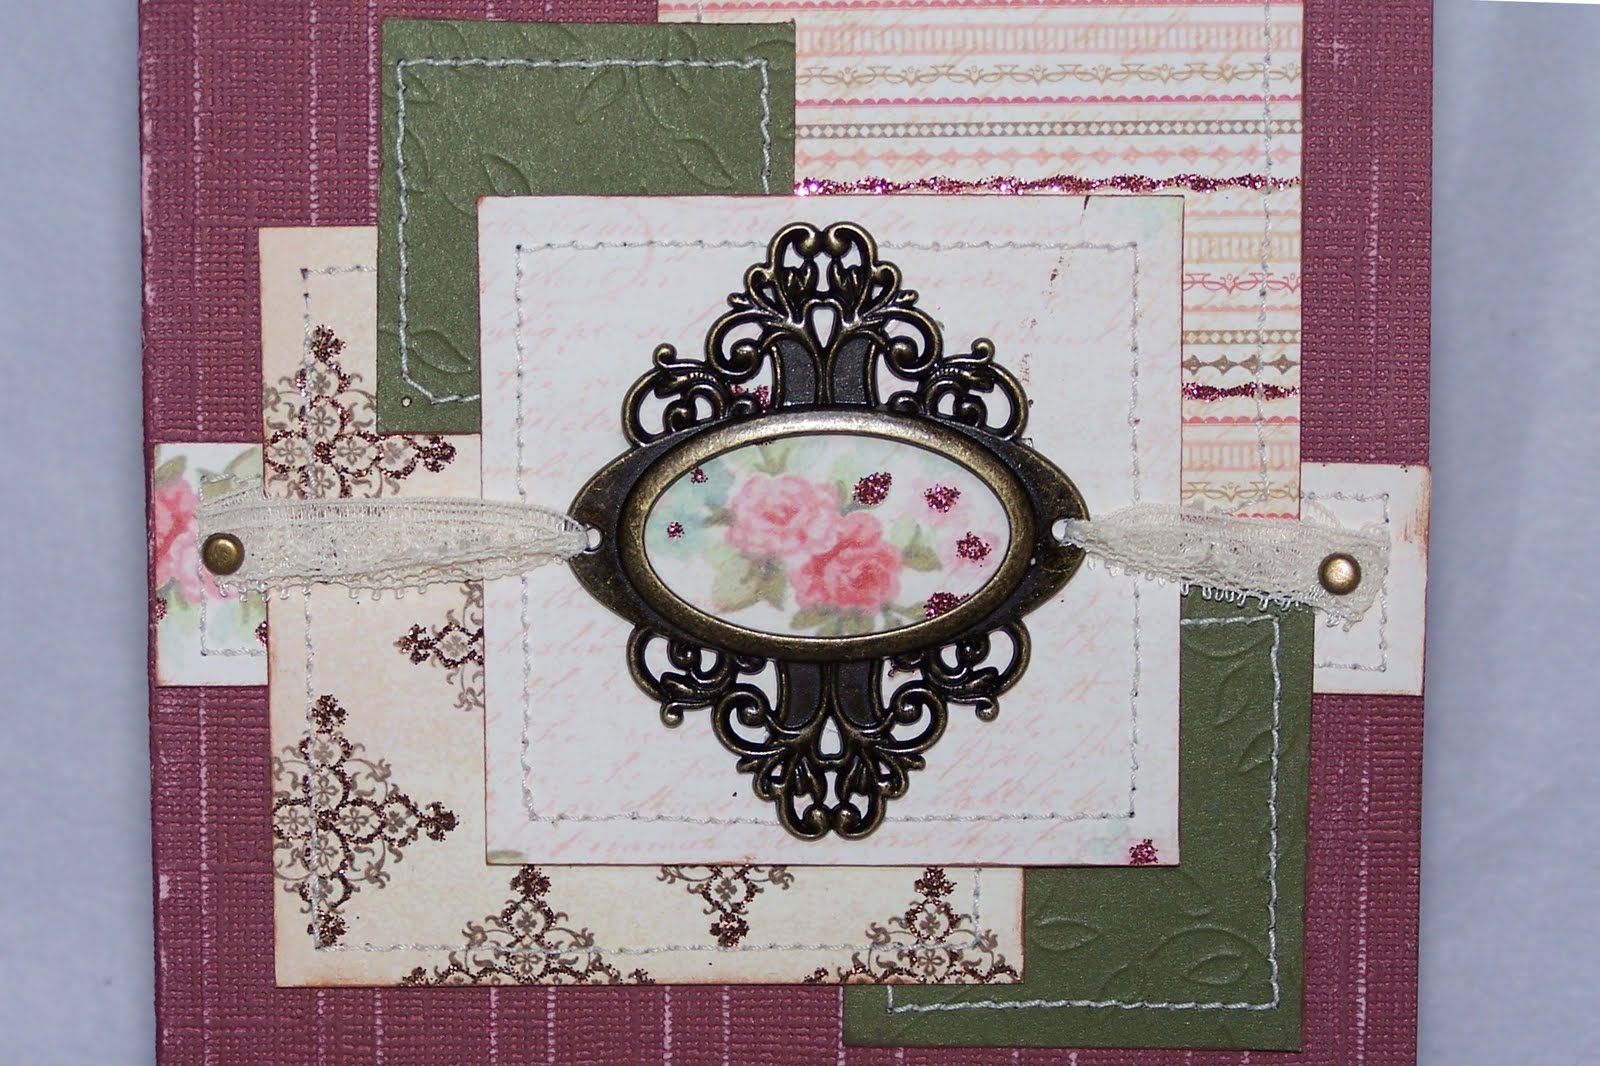
Here it is: I used a design from a Close to my Heart design book, although I made the card larger to have enough room for all of us to sign.


The patterned papers were from the Lost and Found line. I just love these glittery pages. The green leaf embossed paper is older Creative Memories paper from my stash.

The medallion is Tim Holtz. (I absolutely LOVE Tim Holtz Products!) This was also my first time sewing on a card. I practiced quite a bit before I actually sewed on my specialty paper. I also just sewed around the pieces separately and then adhered them to the card.

This stamp is from Stampin' Up. I used Versamark Ink and Zing embossing powder on it.
The inside of the card just had a small sentiment stamp that said "Happiness always" on it.

Maddie and Ellie, my two younger girls, also made cards for Granny. Maddie used Once Upon a Princess and my Baby Bug to decorate her card. She did all the cutting and pasting herself. Ellie opted for just using stamps. LOTS of stamps. LOL
Here is the inside of Ellies. I just love that she took a scrap of glittery paper and taped it to the bottom of the inside. She spends a lot of time watching me craft, and I am glad she is picking up on things.
Maddie's inside was full of snowflake stamps, as my Mom's birthday is actually in late December.
I love to see the creations that my daughters come up with. They just make my day!

Thanks for visiting today.

Have a Great and Crafty Day!

Jan

Thursday, October 20, 2011

Kindergarten Scrapbook Pages

Hi All,
I am sorry to be neglecting my blog so much lately. I had been feeling so frustrated with my lack of energy and creativity. So to jump start things, I was cleaning up my scraproom and trying to fine-tune my organization. I am having a hard time finding places to put all my stuff. I swear this room is shrinking! LOL (perhaps I am shopping too much too! :) )

So in my cleaning, I discovered that I have 4 bankers boxes full of school memorabilia that I have been saving to put in the girls scrapbooks. I really could use that space better, so I decided to pull out their school books which have been started and not finished, and get caught up on the school pages. I bought these scrapbooks from Creative Memories back when the girls were babies, and my scrapping style has changed so much since I started these books, however, in the spirit of getting caught up, I am not making the fanciest pages.

So here are the pages I made for Mads Kindergarten year. They follow my typical school year formula.

1.) The First Day of School: We always take a picture on the first day with the girls holding signs with what new grade they are starting and the date.

2.) The class composite picture page.

3.) I do a few layouts on various school activities that I may have pictures for. This one is for Spirit Week's Crazy Hair Day.
I always choose only a few really good pieces of artwork/homework to go into the scrapbook. I also use this method of including 8.5 x 11 page protectors into the book for awards and homework pieces. Here I have taped it to the edge of the 12x12 page under the paper. This works well in the Creative Memories Strap-Hinge albums. I have also just cut extra slits/holes to add them onto the straps or posts in my other albums.

Here is is closed :
Here it is opened up:
I had to include Mads drawing of the Human Body in here:
Here is the page with the rest of the chosen artwork: Some times I also use the girls artwork as my background papers in the school book layouts


I have a few more layouts to do to complete Mads Kinder-year. I hope to share them in a another post soon.

Carts Used:
Mother's Day Bouquet cart for the flower in the first layout
Printing Press for the Crazy Hair Day title.
Birthday Bash & Best Friends Patterns on the Imagine for the Banner Pieces.

On 'My Lil Artist' I used all Sizzix dies for the titles and scalloped square.

If you have any questions about my school albums please feel free to contact me.

Thanks for visiting today.

Have a Great and Crafty Day.

Jan


Tuesday, October 4, 2011

How old would you be...card

Hi All! Wow! Posts two days in a row! I am on a roll!!! LOL

Today I am sharing a card I made for my Father In Law.

The radio image is from DCWV Tattered Time Stack. This stack has so many neat pages on it. I used Recollections cardstock for the card base. It was plain grey ans looked too clean for the distressed artwork so I sprayed Glimmer Mist in Candy Apple Red and Graphite on both sides of the card base. I then used Tim Holtz Distress Ink in Black Soot and Fired Brick to give it a more aged look. It is kindo of hard to see the red tints to the base card in this photo. I gotta learn how to take better photos of my projects!

I cut the tag from CTMH Art Philosophy cartridge. The tag and layer are on pg 45. They were cut at 1.25 in. The sentiment I have had for a while now, and I am not sure who its by. I think I bought it at Michaels. Its part of a clear stamp set. I attached it to some red twill tape, and secured the tape using my Tiny Attacher.

I don't usually decorate the insides of my cards, but I am trying to remember to do that more now. Here I just heat embossed a sentiment from Stampin' UP using Zing embossing powder. I added a twill tape and brad accent to the cardstock as well.

It is a pretty simple card, but I think it works. I am sure my FIL will appreciate it.

Thanks for Visiting today.

Have a Great and Crafty Day!

Monday, October 3, 2011

Quick and Easy Cards

Hi All! I can't believe I finally have a crafty post! It has been TOO long. I have been feeling a little like my MOJO had abandoned me, so I spent quite a bit of time just perusing the Internet, you-tube and various blogs and Magazines to get some inspiration and help get my creativity flowing again.

I saw this fabulous idea to use the 12x12 pages that have the ATC sized cards printed on them, as the fronts for greeting cards. I always loved buying these types of 12x12 cardstock, to use for accents on my scrapbook pages. I felt they were really "smashbook-ish" (Is that a word?? LOL) Now I have another great use for them as well.

Here is a picture of the papers I chose to use. It is Fancy Pants Paper. The line is The Daily Grind. I used the DG cards page and the DG Strips page. I found these great papers at the Scrapbook Expo this year.

I also used premade cards from JoAnn's that I have had in my stash forever. It felt good to not only be crafting again, but to be using up some stuff that was just sitting there.

So for the few cards that I made, I just did a basic design, with very little extra on it and no sentiment. I figured I would just put these in my stash, and when I needed a card, I would then add the sentiment and any extra more specific embellishments based on whether I needed a birthday, anniversary, get well, or just a hello card.

Here are the cards I made:
This one was made using two pieces from the strips paper. I just added a light green rick-rack bow to it.

This one I just double mounted the card on a blue and then a cream colored cardstock and added some gem flowers to it.
This one I used a new embossing folder on the dark blue cardstock. It is called Scalloped Dots by the Paper Studio from Hobby Lobby. I then added a few brads in coordinating colors to the centers of some of the scalloped dots and offset my DG Card front.


This is my least favorite of the cards. I embossed the card base using CuttleBug's Script Texture and I lightly sanded it. Then I used a piece from the strip paper and a white bow. Its kind of plain still, but eventually it will get more embellishments.
This one is my favorite one. It is the one I spent the most time on. I stamped swirls on the card base using versamark and heat embossed it with some holographic embossing powder. I mounted the DG card on some cement colored cardstock that I had punched using a border punch. I then cut some flower layers from the Flower Shoppe cart. I cut the Mum2 and Mum 4 in both 1.75 and 2.0 inches in vellum. I stamped some layers using brilliance ink, and I embossed some using Cuttlebug's Swiss Dot folder. I added some bling to the card front.

I really like this DG Card so this card is rather simple. The red plaid paper is from Imagine Best Friends Cartridge. It was a leftover from a previous project. :) I added a small blue bow that matches the blue stripe in the heart. It is so simple, but I just love it!

Here is my last card: I really liked this DG Card too. I just tied a sheer white bow to the card, and mounted it on a piece of vellum that I had embossed using Cuttlebug Stylized Flower folder. I attached the vellum layer to the card base using some silver brads.

All of these cards are really simple, but I am happy with how they turned out, and how quickly I put them together. I have more types of these ATC pages, so I am going to look through them and see about making more cards in the future.

Thanks for visiting today.

Have a Great and Crafty Day!

Jan